Pages

Monday 30 November 2015

Redesigned House Plans: Our Sweet Suite

Last week I introduced my new series, “Redesigned House Plans.”  If you missed this post, click here to learn about what I’m about to do.

The first segment, “Our Sweet Suite,” will be an analysis of our current home.  It is completely hypothetical since we are renting and can’t alter the property without permission of the owner.  I decided to take a look at our basement suite because it is the first place we’ve lived in since we married that feels like “home” to me (ie. I like it a lot and hope to stay here for a while!).

Our basement suite.
Notes: Cross-hatched section is inaccessible to us (doors from kitchen and laundry room are locked). Windows are not included.  All measurements are approximate (rounded to the nearest 6 inches).

What I Like

  1. I like the central location of the bathroom.  It is conveniently placed near the bedrooms but is also easily accessed from the common living areas (the kitchen and living room).
  2. I like the large entryway, kitchen, and dining room.  There is plenty of space for many people to remove coats and boots in the entryway and to cook and clean in the kitchen without bumping into each other.  The dining room is large enough to fit a table for eight and still have plenty of leftover space.
  3. I like the generous amount of counter space in the bathroom and kitchen.  More counter space in the bathroom makes the room feel more spacious.  More counter space in the kitchen equals more room to prepare food.

What I Don’t Like

  1. The most annoying part of this layout: going to the dining room from the kitchen for meals.  It is awkward and inconvenient to say the least.  But let me explain why it was designed this way.

    Stage 1: Before the back porch.
    Stage 2: Storage underneath back porch.
    Stage 3: Current layout.
    [Note: I included the windows from the kitchen into the dining room but forgot the one from the hall into the entry.]

    Originally, this suite didn't include the current dining room and entry.  Perhaps it wasn’t even a suite back then.  The door from the entry to the hall is actually an external door and the remains of a doorbell can still be seen. 

    The dining room is positioned below the back porch add-on and was used as a storage area.  Later, tile was installed over the concrete floor and previous tenants used the room for storage, eating, or whatever else.

  2. There is an excessive number of doors in the suite.  The main reason there are so many doors, of course, is because of the previous layout.  I personally think the doors from the entryway to the dining room, entryway to hall, and hall to kitchen are not necessary.
  3. There are unnecessary windows looking into the dining room from the kitchen and from the hall to the entry.  Understandably, this is because of the addition of the back porch and dining/storage room to the house.
  4. I don’t like the location of the kitchen sink.  It is difficult to wash the dishes without counter space on both sides of the sink.  For me, at least, I like to have the dirty dishes on my left and work towards my right.

    My typical dish-washing system (with section d to the left of the sink and sections a and b switched): Take dirty dish from section d, wash in section b, rinse in section a, dry in section c.
    My current dish-washing system: Take dirty dish from section a until empty and then from section d, wash in section b, rinse in section a, dry in section c.

  5. The pantry is too small.  To make things more difficult, the folding door interferes with the space needed to put in and remove items.
  6. It seems that in rental suites there is never enough closet space (or it is in inconvenient locations).  There isn’t a linen closet for the bathroom and only one hallway closet for storage besides bedroom closets.

How We’ve Embraced the Space


extra pantry space in kitchen, recycling and cleaning stations in hall, storage space in entry, dining room contains Lucas's tinkering, Kristina's gardening, games.
Zones we've implemented to make things work for us.

We've been able to maximize our space by using zones in various rooms.
  • Entryway: extra space is used for storage (mostly old packing boxes and our bikes right now).

    entry storage
    We really need to get rid of those boxes...
    • Dining room: table in center of the room, and then in the corners we have a chest freezer, Lucas's tinkering table, games storage, and my container garden.

      Lucas's tinkering table, freezer, dining room table
      Lucas's tinkering table, freezer, dining room table.

    games storage
    Games, oh our lovely bunch of games... ;)
    My (wilting) container garden brought indoors for the winter.

    • Hall: recycling station and cleaning supplies nook.
    Our messy recycling station.
    Cleaning Supplies Nook
    Our cleaning nook.

    • Kitchen: extra pantry items on shelves.

      Extra "pantry" space... on shelves.

      What Should Be Changed

      And now, what you've all been waiting for...

      The re-done floor plan of our basement suite!
      1. At the least: remove doors.  No door is needed from the entry to the hall and from the hall to the kitchen.  Even more so, remove walls.  No walls are really needed between the entry and hall and the hall and kitchen.  Removing doors and walls would make it easier to pass between rooms and opens up the space.
      2. Build a small coat closet in the hall where our current cleaning nook is located.  It is close to the entrance and no temporary wardrobe or several coat hooks are necessary to corral coats, shoes and boots.
      3. Open up the wall between the kitchen and dining room next to the living room to make a doorway.  (A small portion of counter and cupboards would have to be removed and the previous doorway filled in.)  This is the more convenient set-up to be able to serve food, eat, and clean-up without feeling like you are running in circles (or, rather, U-turns).
      4. Build a small storage space with the extra room in the entry.  For renters, at least, this is an awesome addition!
      5. Rearrange the counters, cupboards, fridge, and sink in the kitchen so that there is counter space on either side of the sink and fridge.  This allows the counter space against the dining room to be used mainly for cleaning and serving and the opposite counter for preparing and cooking food.

      The Final Comparison

      floor plan comparison
      Click to view larger size.


      What do you think?  Assuming it is all possible, is this a good or bad change to the floor plan?

      Next week's topic: [Microsoft Excel 2013 Family Budget Spreadsheets for 2016]

      Monday 23 November 2015

      Redesigned House Plans: Introduction

      Do you live in your dream home?


      "Could this be the one?" [Credit: Couple Viewing/Dreaming/Buying Home by Mark Moz.]
      "Could this be the one?"
      [Credit: Couple Viewing/Dreaming/Buying Home by Mark Moz.]


      If you do, that’s awesome!  Tell me about it!

      If not, does your current home have the potential to become your dream home?

      Redesigned House Plans

      In this series of posts, which I am calling “Redesigned House Plans,” I will be experimenting with existing floor plans of various homes, whether or not I lived in them.

      A sample floor plan. [Credit: 1962 Georgia Pacific by Ethan.]
      A sample floor plan.
      [Credit: 1962 Georgia Pacific by Ethan.]

      This is what will happen for each segment of the series:
      1. I will measure the dimensions of the home (or specific space of the home).
      2. I will draw a floor plan based on rough approximations of the dimensions.
      3. I will analyze all or a section of the plan, noting likes, dislikes, and problem areas.
      4. If provided, I will include ways the residents have "embraced the space" to maximize its potential.
      5. If I see that there could be beneficial changes made to the plan, I will re-draw part or all of the plan and describe how these slight alterations help better serve its purposes.  
      (Of course, this is all based on my opinion and, at times, on discussions with other home owners or tenants.)

      Disclaimer:  In analyzing these homes, I am in no way blaming the current or previous landlords or home owners for the structure and layout of the building.  I am merely trying out ideas on paper.

      Why am I doing this?


      The main reason: for fun!  I like drawing floor plans, real ones or imagined.


      First Floor Layout Pixel Art
      This is a really basic floor plan I drew as a young teen when attempting pixel art.  It is poorly arranged but the concept is fairly clear.  I didn't attempt to design the other floors like originally planned.


      Other reasons I want to do this series of posts are:
      • To compare different layouts and use of space
      • To analyze what does and doesn’t work in a floor plan
      • To see on paper what dimensions “feel good” spatially
      • To begin more serious design of our dream home based on what I learn
      • To help home owners and designers consider other options for trouble spaces

      My first project I will begin next week.  I will review our current home: a basement suite we are renting.

      Are you living in your dream home?  If not, what do you see in your current home layout that, if changed, could make it become your dream home?

      Monday 16 November 2015

      Family Devotional & the Thank You Jar

      The Ogrins Family Devotional


      President Ezra Taft Benson:
      “Rearing happy, peaceful children is no easy challenge in today’s world, but it can be done, and it is being done. …

      “Children must be taught to pray, to rely on the Lord for guidance, and to express appreciation for the blessings that are theirs. ...

      “Families must spend more time together in work and recreation. Family home evenings should be scheduled once a week as a time for recreation, work projects, skits, songs around the piano, games, special refreshments, and family prayers. Like iron links in a chain, this practice will bind a family together, in love, pride, tradition, strength, and loyalty.

      “Family study of the scriptures should be the practice in our homes each Sabbath day.

      Daily devotionals are also a commendable practice, where scripture reading, singing of hymns, and family prayer are a part of our daily routine.” [source]


      I believe it was the quote above that gave me the idea to have an official “family devotional” rather than just family scripture study and prayer.

      Our Family Devotional goes like this:
      1. Scripture reading
      2. Thank You Jar
      3. Prayer
      I hope, as Tevia grows up, to enrich our devotional to become something like this:
      1. Song
      2. Scripture reading & brief discussion
      3. Thank You Jar
      4. Review plans for the next day
      5. Prayer
      We have our Family Devotional early in the evening, shortly after the dinner dishes have been cleaned up and before putting Tevia to bed.  (Sometimes an evening walk or drive is included before or after our devotional to help Tevia relax.)

      The Thank You Jar

      The idea of a “Thank You Jar” started a few years ago in my own family.  The idea is similar to keeping a gratitude journal, but for the entire family to share.  I’m not even sure who came up with the idea or why we started it in the first place.

      What you need:
      • 1 jar
      • 1 writing utensil for each family member
      • 1 small piece of paper for each family member

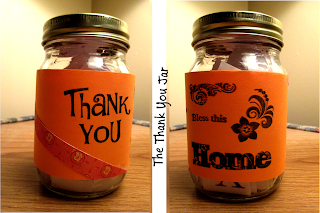
      The Thank You Jar
      Our fancy jar

      Each person completes these sentences on their slip of paper:
      1. I am thankful for…
      2. A blessing I saw today was…
      Then he or she flips the paper over, writes his or her name and the date on the back, and folds the paper in half.  The jar is then passed around and each person drops in their folded piece of paper.

      Once the jar is full, the papers are read aloud to the entire family and you find out what your family really is grateful for!

      Nearly full thank you jar
      It's nearly full!


      Since we want Tevia to understand what we are doing when we write on our pieces of paper, we each read what we wrote down before we put them in the jar.  Maybe we will always do it this way – who knows!

      How We Include Tevia

      Tevia already knows and understands the order of how we do things.  When we say, “Time for Family Devotional!” she goes to the living room and will either point at the scriptures or jar or clasps her hands together (her sign for “praying”) and sits on the floor.  (I really wanted to include a picture of this pose but there was no way she would sit still once I took out the camera!)

      scriptures
      So you can admire these scriptures instead... right?

      Lucas and I take turns reading a few verses of a chapter in the Book of Mormon and, before we are even close to being done, Tevia points and yells at the Thank You Jar.  While we write down our thoughts, Tevia gets to play with the screw lid and then helps put it back on the jar after we put our pieces of paper inside.

      Then, if she hasn’t done it already, Tevia clasps her hands and sits on the floor where we kneel with her.  She usually doesn’t stay in that position for the whole prayer, but she is generally quiet and moves very little.  I’m so proud of her whenever she is still!  Soon I know she will be able to repeat words of the prayer.

      Of course, next is bedtime (the saddest part of the day for her).  But at least she is excited for Family Devotional!

      If you don't already have something like this in place, I challenge you to make your own kind of Family Devotional!  What does (or will) your family do?

      Next week’s topic: [Redesigned House Plans: Introduction]

      Monday 9 November 2015

      My Morning & Evening Routines

      I think you could say schedules and routines excite me even more than goal setting…

      My earliest experience with making lists and schedules started with playing with dolls with my little sister.  We (or perhaps it was just me…) liked to name each one and, at minimum, give them an age, grade level, and bedtime, which was meticulously written down by me in a detailed table.  We referenced this list as we played.

      I also wrote schedules for myself – to the very minute! – for the entire day every once in a while.  I was very much a perfectionist and was hard on myself whenever circumstances challenged my plans.  Depending on my mood, I would either scrap my schedule for the rest of the day or skip over a few activities until I got to the current time slot.

      I color coded my school timetables in junior high and high school and would study them in fascination, analyzing the patterns of class type, location, time, and day, until memorized – and even still afterwards.  So I don’t think you’ll be surprised to find out that I was absolutely stoked when I got to create my own timetables in university.  (I confess that I even get overly excited when Lucas gets to choose his own classes and he sometimes lets me try to condense his schedule to make it more efficient.)

      Schedule or Routine?

      First, a note: the difference between a schedule and a routine is that a schedule is a sequence of activities that follows time constraints and a routine is a set of activities not necessarily sequential or strictly timed.

      Schedules are great if you have many time constraints throughout your day.  They are very efficient if activities can be timed closely or overlap typically unproductive “dead time” (like travel time).

      Routines are great if you require a lot of flexibility throughout your day.  They are very efficient if you are motivated to move quickly or are well focused on the task at hand.

      I think being able to use a combination of schedules and routines in your day is the most efficient and time-wise thing you can do for yourself.  If you can, have a morning and an evening routine you follow each day with scheduled productive time in the day (such as work or school).

      Determining My Own Routines

      A goal I set this year was to come up with morning and evening routines that would help me accomplish the necessary things each day plus have time to do the things I really want to do.  Some other goals I want to accomplish have been included in these routines to help guarantee that I would actually set aside time each day to work on them.  I also am sure to consider mine and my family’s needs when deciding what to include.

      My routines have now been revised three times since July this year.  What you see below was just redone this past week and I think will work the best for me.  I started out with just a rough sketch of what I thought I wanted to accomplish in the morning and then in the evening, but it was really just too much stuff.  My second revision cut out a few things and rearranged others.  This time I decided to use nap times to my advantage based on how things were typically going in the last two months.

      Morning and Evening Routines
      Side 1 of printout

      For the first part of the morning and evening, I actually try to follow a schedule as best I can.   Sometimes I switch the order of how I do things in the morning, but I still try to get as much done as possible before Tevia wakes up.  In the evening I have Lucas to help and so things tend to go smoothly.  We switch between washing dishes and bathing Tevia each night.

      For the naps and my own bedtime routine, I just included approximate lengths of time it would take to accomplish those tasks, especially since I can’t always determine when those will happen.  Being a mom, I most definitely need flexibility!

      Weekly Morning Activities and Exercises
      Side 2 of printout

      I decided to assign a different activity to each day of the week to work on during “Nap 2.”  I also included an area where I can list which exercises I have been assigned to do by my chiropractor.

      I am definitely still struggling to follow my routines.  Some days are better than others.  Sometimes I only get to follow my morning routine or just the evening routine or something in between.  Sometimes I just have a rough, chaotic day and wonder if I should just give up even trying to get anything done.

      But I’m still trying.  I think I can make things easier for myself if I have things in their proper place each morning and night, ready for the next iteration of my routine.  For example, having the clean dishes put away and picking out my outfit for the next morning before going to bed.

      Do you follow a daily routine?  What do you include in it?

      Next week’s topic: [Family Devotional & the Thank You Jar]

      Monday 2 November 2015

      Goal Setting: Good, Better, Best!

      I love goal setting!  I regularly set goals throughout the year.  Goal setting has become like keeping a journal for me.  I have learned how to fully express my thoughts on paper – or, more accurately, a screen – so that I am able to see exactly what I want from myself, why it’s important to me, and how I’m going to do it.

      And guess what?  I’m going to teach you how I do this!

      Good

      I’ll start by showing you what I used to do.  This is a sample of what many of my goals looked like from the time I was child until I started high school.

      New Year's Resolutions

      I would typically only set goals as New Year’s Resolutions.  That’s a good practice, but “everyone does it” and it usually doesn’t go very far.

      As you can see from this list, the goals I chose are quite random in regards to topic of interest, difficulty/complexity, and time constraints.  Some goals were
      • meant to be accomplished far in the future (ie. not necessarily within that year),
      • not entirely within my control (like getting married in the temple),
      • too vague (what is required to get on the honor roll?), or
      • too rigid (is it realistic to expect myself to exercise every single day?).

      Often my interests would change drastically throughout the year and I would end up letting my eyes drift over some of the goals I made.  Sometimes the goals I chose were too challenging and I’d give up on those too.  (I was a bit too ambitious when it came to solving a Rubik’s cube and cup stacking in record time.)

      Now You Try!

      Write a simple list of 3 or more goals you’d like to accomplish at some point in your life.


      Better

      Have you ever heard of SMART goals?

      Smart: Specific, Measurable, Attainable, Relevant, Time-bound

      SMART goals are specific, measurable, attainable, relevant, and time-bound. 

      A goal must be specific as to exactly what you are wanting to accomplish.  For example, make a goal to “wake up at 6 a.m. every weekday,” rather than simply, “wake up earlier.”  Write your goal as a complete sentence starting with “I will...” to give yourself a sense of accountability.

      It must be measurable, meaning you can keep track of your progress by a number, percentile grade, hours, etc.  Another way to do this is to have sub-goals or smaller steps that can be accomplished one-by-one until the major goal can be completed.  The following chart is an example of how you can keep track of your progress:

      Kristina's Progress Chart

      It must be attainable for you – not too hard, not too easy, not according to someone else’s standards. 

      It should be relevant to your current lifestyle and values.  If it isn’t important to you now, then you aren’t going to be motivated to work towards it. 

      And it must be time-bound, ie. give yourself a due date!

      Here is an example of a goal I made last year, ensuring I was following the SMART guidelines:

      smartgoals2015
      I also included how high of a priority this was (in comparison to other goals I had made at the same time), additional steps that would help me accomplish this goal, and who I was accountable to whether or not I was able to achieve it.

      This is a better method for setting goals because it helps you to narrow the focus of your goal.  It is a guideline to help you figure out what is necessary to consider if you aim to achieve your goal.

      Now You Try!
      Take those 3 goals you listed above and flesh them out according to the SMART goals acronym.


      Best 

      I took this further this year with my goal setting by (1) making my goals SMARTER and (2) writing down my thoughts and feelings.

      Smarter Goals: Specific, Measurable, Attainable, Relevant, Time-bound, Evaluated, Reviewed

      This is an expansion on SMART goals: SMART-ER goals!  Make your goals SMARTER by evaluating and reviewing them.

      A goal can be evaluated when completed or still in progress by assessing your goal’s “measurements” and determining how well you are doing at accomplishing it.  For example, if you currently have an average of 75% in math, is this approaching your goal (if it was, say, 80%) or are you falling behind (95%)?

      A goal should be reviewed once the deadline has been reached, but can be reviewed sooner if needed.  Ask yourself:
      • Have I accomplished my goal to its fullest potential?
      • Are there additional steps I didn’t consider beforehand?
      • Are my measurements realistic for this kind of project?
      • Is it too hard or too easy?
      • Is this still relevant to me?
      • Do I need to extend my deadline?
      • Do I need some help from friends, family, coworkers, etc.?

      Answering these questions will highlight the weak points of your goal or, at the least, just remind and encourage you to keep working towards it.

      This is the best way to set goals because it encourages progress – not only of yourself by continuing to set goals, but also of improving the effectiveness of your goals with the experience you will gain as you put these guidelines into practice.

      The example you can see below is more of a demonstration of the –ER of SMARTER.  I visit this document regularly, especially if I know I am not doing a good job of accomplishing one of my goals, to update the additional steps or add my feelings about a certain topic (inside the textboxes).  I found that reading those textboxes helped to remind me of why I set those goals and motivates me to accomplish them for the right reasons: to make myself a better and happier person and to help others feel the same about themselves.

      kristinagoals

      In case you were wondering, I also break down my goals into different categories from higher to lower priority.  They are:
      1. Personal
        1. Spiritual
        2. Physical
        3. Mental
        4. Emotional
      2. Family
        1. Wife
        2. Mother
        3. Extended relations
      3. Home & Garden
      4. Community & Friends
      5. Education & Work
      6. Talents & Skills

      Now You Try!

      Make sure to expand on your SMART goals by evaluating and reviewing them regularly and after you reach your goal’s deadline!


      What method do you use when goal setting?  How effective is it?

      Next week’s topic: [My Morning & Evening Routines]